Installing devices - 4.6 Sender
|
Part Number |
Description |
|
(2094-12006) |
lab2lab Sender |
Each Sender installation requires that a minimum area of 1000mm (w) x 500mm (d) of bench space is available. This allows for mounting the Sender, with space for the associated laptop, barcode reader and labware in use.
The Sender can be freestanding or, for extra security, it can be fixed to the bench using 2 off M8 bolts of suitable length for the bench thickness, as shown below (all dimensions are mm). Holes must be drilled in the bench top to accommodate the screws and SPT Labtech can supply the necessary template for the drilling position.

Services are connected to the rear of the Sender.

A hole must be drilled in the ceiling (tile) above the Sender for the acrylic pipe to pass through.
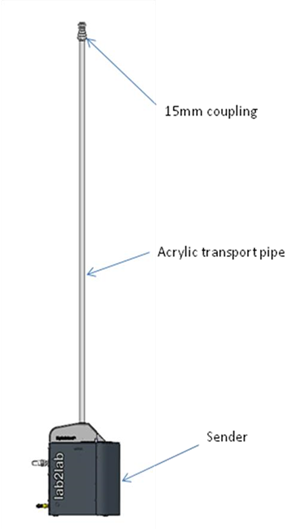
Once the necessary connections are made in the ceiling the rigid transport pipe is connected to the Sender via the coupling in the top of the device. The acrylic transport pipe for the Sender can optionally be fixed to the wall with mounting pillars.
You must ensure the PTFE pipe is able to drop vertically to the correct mounting position of the Sender and inform SPT Labtech of its precise location for the installation.
Installing devices - 4.7 Automation sender >>>
.png?width=300&height=157&name=spt%20logo%20png%20(1).png)